
Creating Chevron in PicMonkey
Well, we are halfway through this "Crazy for Chevron" week long party! I hope you have been enjoying it and have gotten some ideas. I'm particularly excited about today's tutorial. Lately, I've gotten more involved in editing images and creating pictures/headers/buttons for my blog. PicMonkey has been my favorite tool that I use. I love all the features and have a blast playing around with the tool. A lot of times I will use a background for my pictures. Many times I've wanted something chevron. Now they have one chevron background, but I like using different colors as well. I usually end up having to search for a file that is royalty free (and free to purchase). I can usually find something I like, but it occurred to me that it would be nice if I could make my own chevron design.

So, when I had the idea for this Crazy for Chevron party, I got on PicMonkey and started playing around. First I tried using triangles to create the chevron pattern. The problem was that you can't widen out the triangle while keeping the same height, it makes it a lot taller as well. The triangle in PicMonkey seems to have to stay in an equilateral triangle shape, making it hard to use for chevron. The zigzags ended up being really tall, not quite what I wanted. I got to looking around, though, and decided to see what would happen if I used a pentagon. Success! I was so excited to see that it worked and made for a really cute chevron design. The rainbow chevron in my "Crazy for Chevron" button was made using this, I love it!
If you haven't used PicMonkey before, go check it out, I love it! Most of the features in PicMonkey are free, there are just some additional features, fonts, shapes, etc you can use with the Royale membership. I recommend the Royale if you are going to use the program a lot, but today's tutorial can be done with the free membership.
I tried to take some screen shots to help explain in pictures how I created this look. Here's the steps I used:
- Open a picture in PicMonkey (doesn't matter what)
- Resize the picture to what you want for the chevron design (you can see below I was working on the thin link banner I have on my page, that's why it is so long)

- Cover the picture up with a rectangle to clear out the picture. Use whatever color you want to be as a base. For this example, I was doing a gray and white chevron, so I made the base white.

- Create a small hexagon in the other color you want in the chevron pattern. The size will depend on how deep/large you want the zigzags to be, you can play around with this

- Line up hexagons to be overlapping each other - a good rule is to make the bottom left corner of the hexagon you are adding touch the bottom right corner of the previous hexagon.

- To make sure each hexagon is the same color/size, you can right click on the shape and select "Duplicate overlay"

- Continue adding hexagons until you've completed a whole row

- Add in a gray rectangle to cover up the white space on the bottom

- Create hexagons of your second color now. You can duplicate one of the other hexagons (to ensure the same size) and just change the color. Line them up so the top point is in line with the previous row. How far down you put the hexagon depends on how thick you want the chevron pattern.

- Continue the process until you now have a row of white rectangles (or whatever color you are using) all the way across the file

- Repeat the process back and forth until you have reached the bottom. It gets a little harder to line up the hexagons when you can't see the bottom, but you can use the previous row's top points to line up where the hexagons should go.
This process can be a little time consuming, but it creates a unique and personalized chevron pattern using the size and colors you want. Other programs may have a tool where you can highlight the whole row of shapes and copy and paste - that would speed it along. PicMonkey may have this feature too, I just haven't found it yet. I'd love to hear feedback if I'm just missing out on that.
Have a great week and don't forget to check back, I've still got some fun and interesting posts for you! Here's the schedule, you will definitely want to come back for the Friday DIY tutorial. I'm showing you how to spruce up your home office with chevron DIY projects!

Feel free to share this party on Facebook, Pinterest, Twitter, etc. Here is my button for the party:
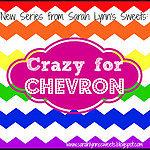
<a href="http://sarahlynnssweets.blogspot.com/search/label/crazyforchevron" target="_blank"><img src="http://farm3.staticflickr.com/2864/9430735589_cc579cbb4f_m.jpg" alt="Crazy for Chevron" width="250" height="250" /></a>

