
Decoupage Tablet Holder for the Kitchen

I'm really excited about today's post, it is something completely different for my blog! For those of you who frequently visit my site, you know I normally post about sweet treat recipes or creative cake decor. But, I've tried to implement a new posting schedule and have allowed for Fridays to kind of be an "anything goes" day. I am posting anything and everything - as long as it somehow ties into blogging or cooking/baking. So today I am bringing you a simple and cute DIY craft. It's my first craft I've shared on the blog!!
Last week I was over at Chatting over Chocolate and saw the most adorable tablet holder for the kitchen on her "How Pinteresting" post. I quickly pinned it and decided I had to try to make something similar. The tutorial comes from Mamie Janes' blog, click here to see her tablet holder that inspired me! She found a way to create a tablet holder using a cutting board, Scrabble tile holder, and a building block. Her tablet holder was based on one she saw on Pottery Barn's website.
I decided I wanted to make something similar that I could use for my iPhone. I actually don't have a tablet yet, but I do use my iPhone to pull up recipes in the kitchen. I have had a couple almost disasters where I set my phone down on the counter and then realized it was an inch away from a puddle of water!! I've been wanting some sort of stand or something to prop it up on in the kitchen when I'm reading recipes off my phone. I've already started using it and LOVE it. Originally I thought about making a small one just for my iPhone, but I'm glad I made a larger one. Maybe someday I'll get an iPad...
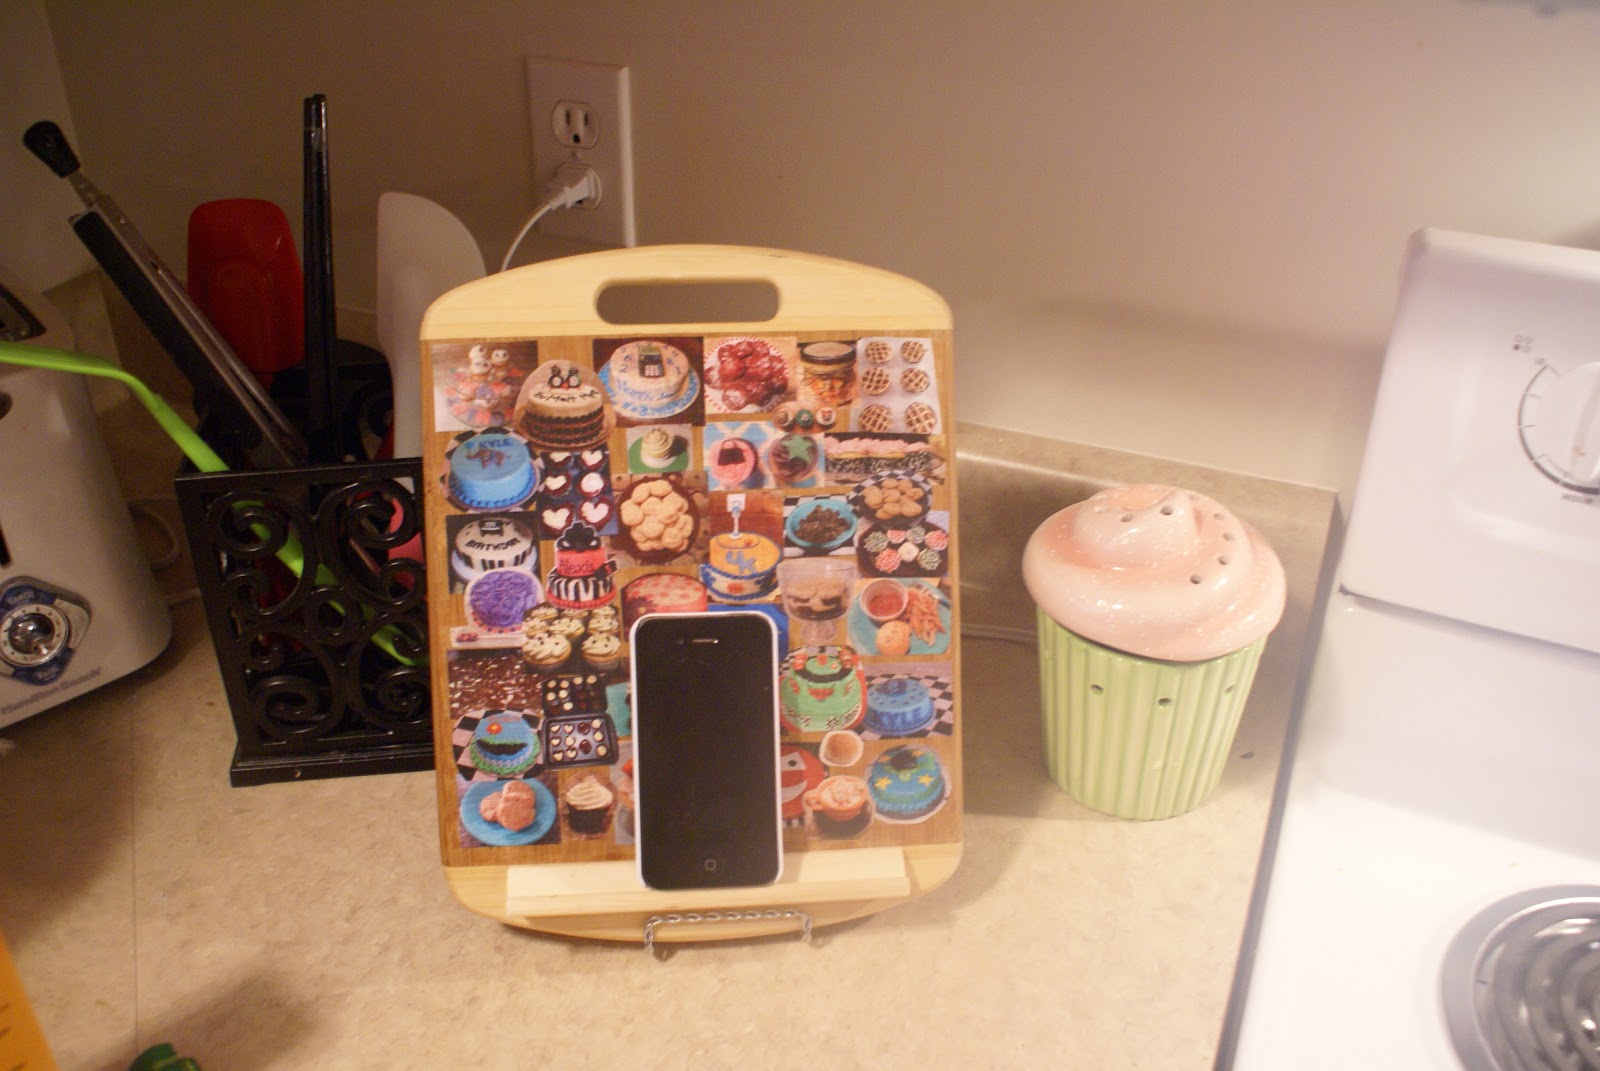
This craft didn't cost very much at all! I already had an extra wooden cutting board. We also had a Scrabble game and since it is just my husband and I playing it, we don't need all four holders. I did not have a building block to glue to the back. I decided to use a frame easel holder instead of gluing a building block to the back. Putting it on the stand makes it more versatile and easier to store. I could even hang it on a nail, since the handle has a hole. I might need a larger easel if I use a heavier tablet, but for now this Dollar Store find works great!

Stand for cutting board
I wanted to add one additional touch to the cutting board. I LOVE making collages and doing decoupage. I went through a phase when I got my first apartment where I would try to decoupage everything - notebooks, tops to cheap storage containers, wooden laptop stand, remote holder, etc. I haven't done any in a while and decided this would be great for the iPhone holder. I had been looking for a way to display pictures of the treats in my kitchen. How perfect!
So here is how I made my personalized kitchen iPhone/Tablet holder, hope you try to make one too! I'd LOVE to hear about it, or see pics, if you try this out.
Decoupage iPhone/Tablet Holder for the Kitchen materials:
- 1 wooden cutting board
- Scissors
- Printer/paper
- Modge Podge (or similar decoupage product)
- Paint brush
- Glue stick
- 1 Scrabble tile holder
- 1 frame easel/stand
- Wood glue/super glue
Decoupage iPhone/Tablet Holder for the Kitchen instructions:
- Gather LOTS of pictures/magazine clippings of whatever you would like to cover your board in. I ended up printing almost three pages of 1/2 in - 1 in size pictures. Since you will be overlapping them and cutting some down, you will need several pages full.
- Cut out all the pictures. You will want some to be square shaped and have a background, and some to be cut down to the actual shape or the cake or treat.

- Arrange the collage starting with the square/rectangle shapes as the base

- Arrange the additional pics

- Glue all pictures to the cutting board, make sure to get corners stuck well

- Apply 1-2 coats of Modge Podge over the pictures

- Allow several hours to dry
- Using wood glue or super glue, attach the scrabble tile to the bottom of the cutting board (make sure it is high enough that it won't hit the easel/frame holder)
- Apply pressure for several minutes and then let dry overnight
- Place on easel/frame holder and enjoy!

Hope you enjoyed this handy and creative project! Next Friday I have instructions on how to make some cute artwork for my craft room. Don't forget to check out my other posts from this week - my Piano Cake tutorial and my Orange Julius copycat recipe. Also, check out Plucky's Second Thought later today for my second installment of "Sarah Lynn's Sweets' Guide to Baking and Cake Decorating"!

